TL;DR
- Amazon Attribution is a free, self-service tool that helps you understand how well your off-Amazon marketing is performing.
- You can use Amazon Attribution if you are a vendor, a registered brand owner, a Kindle Direct Publishing (KDP) author. You should know that just being a seller is not not enough, you have to own a registered brand on Amazon to have access to Amazon Attribution.
- If you start a manual setup you can start a new campaign and choose a method, write the campaign details and select ASINs, in the next step you should create ad group and Attribution links, and lastly put the attribution tags in your ads.
- If you need to create multiple attribution tags at once, after starting the campaign you should download the bulk spreadsheet template, fill it out, upload the completed file, add ASINs to the campaign, and launch it.
What Is Amazon Attribution?
Amazon Attribution is a free, self-service tool that helps you understand how well your off-Amazon marketing is performing.
In simple terms: When you promote your products on other channels like Google, Facebook, email, etc, Amazon Attribution tells you how many people actually came to Amazon and purchased because of those ads or links. It works across both paid and organic channels, including:
- Search (Google, Bing, etc.)
- Social (Facebook, Instagram, TikTok, etc.)
- Display ads
- Video ads
- Email campaigns
- Third-party affiliate marketing
Why Use Amazon Attribution?
Amazon Attribution give you three major reasons to use it:
- Measure: You can see how your campaigns are performing, which gives you an exact number of clicks, views, cart ads, and purchases on Amazon.
- Optimize: By using its real-time analytics you can optimize your campaigns and make sure you are not wasting budget.
- Plan: It also helps you for your next plan and tells you through the insights that which channels deliver the best results and where you should invest next.
Who Is Eligible to Use Amazon Attribution?
Amazon Attribution is available to your business if you sell in the Amazon store and use the Amazon Ads console. You can use it if you are:
- A vendor
- A seller with Brand Registry
- A registered brand owner
- A Kindle Direct Publishing (KDP) author
It’s important to know that just being a seller is not enough, you have to own a registered brand on Amazon to have access to Amazon Attribution. So if you sell products for other brands not for your own registered brand, you won’t have access to Amazon Attribution. Based on what I said, if you have an eligible account You can use Amazon Attribution through:
- the self-service console, or
- approved tool providers connected through the Amazon Ads API.
How to Create Your First Attribution Campaign?
Now that you know why you should use Amazon Attribution and what its conditions are, it’s time to create your first campaign. There are two options to start by:
Option 1: Manual Campaign Setup
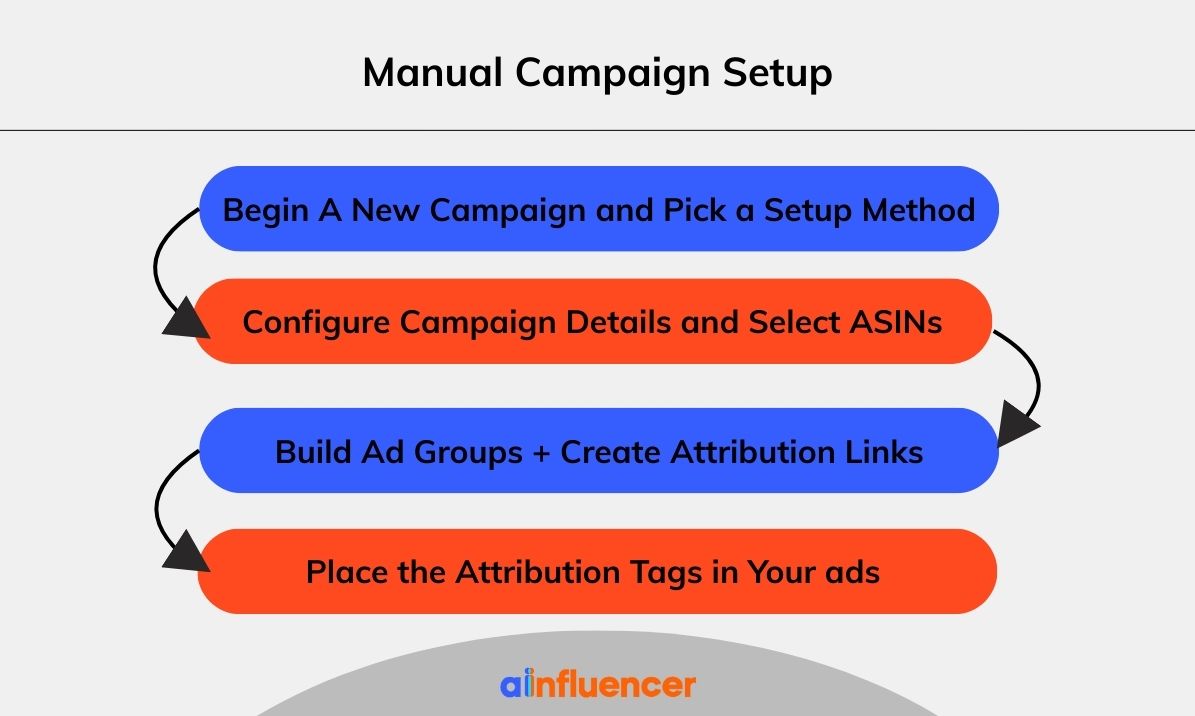
With the manual setup option, you can build your campaign step-by-step. You’ll enter your campaign details yourself and then generate attribution tags for each ad placement.
Step 1: Begin A New Campaign and Pick a Setup Method
First, sign in to your advertising console and open “Measurement and Reporting,” then choose “Amazon Attribution.” Next, go to Campaign Manager, click “Create campaign,” and on the New Campaign page pick the “Create manually” option to start building everything step by step.
Step 2: Configure Campaign Details and Select ASINs
Start by giving your campaign a clear, descriptive name, something that helps you quickly identify it later, like promoting bestsellers, supporting a new product launch, or highlighting seasonal deals.
Next, go to the products pane and select the items you want to include. Only products that are in stock and have photos and prices can be tracked, so make sure you choose the ones that align with your campaign goals. You can also group similar products together, including variations like size or color, to see which items perform best.
If you notice missing products or items that aren’t part of your brand, you can update your brand-to-product mapping in the “Access and Settings” section to ensure accurate measurement of your campaign results.
Step 3: Build Ad Groups + Create Your Tracking (Attribution) Links
Now it’s time to organize your campaign by creating ad groups and generating tracking links. Here’s how you should do it:
- Create one ad group per strategy, tactic, or creative: For example, set up one ad group for an organic social post and another for a paid social ad. This way, you can track each approach separately.
- Ad group name: Give each ad group a clear name based on where and how you plan to use the tag.
- Publisher: Select where this content will actually appear. If it’s not listed, select “New” and type in the name.
- Channel: Pick the channel that matches the campaign you’re measuring.
- Click-through URL: Add the Amazon link you want shoppers to go to, this can be a product detail page or your Store page. Linking to a product page helps drive direct sales, while a Store link is better for browsing multiple products.
- Add more ad groups if needed: Click “Add new ad group” to track different strategies within the same campaign.
Once all ad groups are set up, click Create. Each ad group will generate a unique Amazon Attribution tag, which you can download as a CSV file or copy individually to use in your ads. This makes it easy to track exactly how each campaign piece performs.
Step 4: Place the Attribution Tags in Your ads or Off-Amazon Channels
To finish setting up your campaign, you need to add the attribution tags to all your ads and posts. Copy the unique tag for each ad group and paste it into the destination URL field, replacing the usual Amazon ASIN or Store link, or share it directly with your publisher so every click and conversion can be tracked accurately.
Option 2: Bulk Campaign Setup
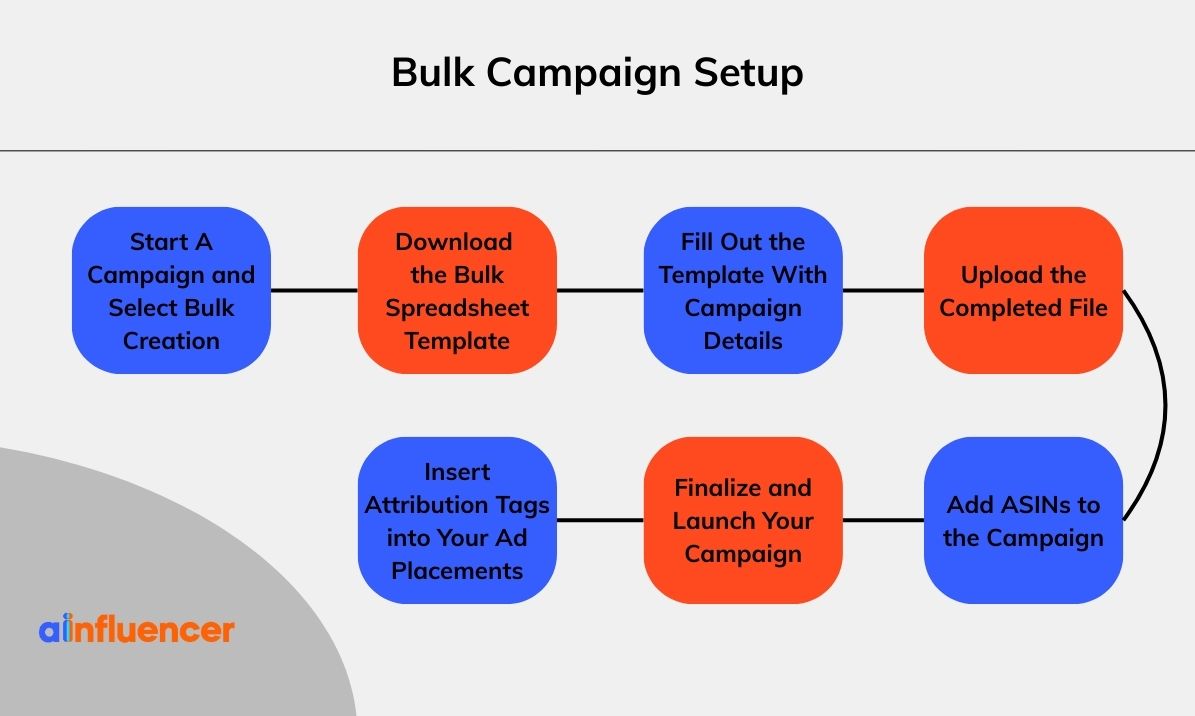
If you want to create multiple attribution tags at once, the bulk upload option is perfect. With a single file, you can measure up to 100,000 Google search keywords or 8,500 Facebook and Instagram ads, saving time and making it easier to track all your campaigns at once.
Step 1: Start A Campaign and Select Bulk Creation
Sign in to your advertising console and open the global navigation to find “Measurement and Reporting,” then select Amazon Attribution. Next, go to Campaign Manager and click Create campaign.
Once you’re on the New Campaign page, choose the “Upload a file to create in bulk” option under Creation Method to start setting up multiple tags at once.
Step 2: Download the Bulk Spreadsheet Template
Go to the Bulk upload settings and pick your publisher, Google Ads or Facebook/Instagram, depending on where your campaign will run. Then download the bulk file template and check the Instructions tab to follow the steps for creating a report with all the required columns listed in the template.
Step 3: Fill Out the Template With Campaign Details
- For a Google search campaign, fill in the required columns in the Keywords tab (A through H) by downloading the data from Google Ads Report Editor. Select Reports → Custom → Table, pick the columns you need, download the report, and copy everything into your Amazon Attribution bulk template. Save the file as XLS or XLSX.
- For a Facebook or Instagram campaign, fill in the Ads tab (A through J) by exporting the data from Facebook Ads Manager. On the Campaigns page, choose the campaigns you want to measure, click the Export & Import icon, and select Selected or All campaigns. Then copy the info into your bulk template and save it as XLS or XLSX.
Step 4: Upload the Completed File
Go back to the advertising console under Bulk upload settings and upload your filled-out bulk file template. The system will check it for errors right away, if anything pops up, fix the flagged issues and upload the file again.
Step 5: Add ASINs to the Campaign
Head over to the products pane where you can see all the items you’re currently selling. Pick the ones that are in stock, have photos, and show prices, and make sure they match the goals of your campaign.
You can group products by type, size, or color in a single campaign to see which items shoppers actually buy after clicking your ads. If something looks off or missing, go to Access and Settings → Brands to manage your products and keep your campaign measurement accurate.
Step 6: Finalize and Launch Your Campaign
Hit Create to start building your tags and launching the campaign. It usually takes around 10 minutes, and you’ll get an email once everything is ready, or you can keep an eye on the progress in the Bulk created campaigns page until it shows Completed.
Step 7: Insert Attribution Tags into Your Ad Placements
Once your tags are ready, download the bulk sheet with all the Amazon Attribution info and save it for later. Then, apply these tags in the right ad manager, Google Ads, Facebook, Instagram, so every ad or post is tracked, and any future uploads will mix new and existing tags automatically.
What You Should Remember About Amazon Attribution
Amazon Attribution makes it easy to see which of your off-Amazon efforts are actually driving sales. Whether it’s social posts, search ads, or emails, you’ll finally know what works and what doesn’t. The key is to plan carefully, track everything, and use the insights to optimize campaigns in real time. By understanding which products and channels deliver the best results, you can stop guessing, save budget, and boost your sales. Start small, stay consistent, and let the data guide your decisions, because when you know what drives purchases, hitting your goals becomes way easier.